


The stator mold is pretty straight forward compared to everything mentioned previously. Size is simple to determine. The inside opening needs to be large enough to allow the rotor threaded rods to pass through, and the outside diameter needs to be large enough to allow drilling mounting holes in it, outside the area where the coils are embedded. Meanwhile, thickness is determined by the coils themselves, only making the stator slightly thicker than the coils themselves.
I just picked up a three 2'x2' pieces of particle-board for my mold, at the local big-box store, to build up a three layer sandwich. The top and bottom layers don't involve much work, but the middle layer does get significant modifications. OK, to each their own, the following is how I made mine. If you come up with another way to achieve similar results at reduced costs, great!
I found center of one of the boards, and took a makeshift circle compass to mark both the inside and outside diameters of where I was going to need to remove material for the coils. I then laid that piece on top of one of the other boards. I screwed the top board to the bottom board (countersinking the heads) and careful NOT to put any screws where I needed to remove material. I then drilled a 1/4" hole dead center in the board, and from the bottom up, placed a 1/4-20 bolt long enough to reach through three boards and still have enough length to put on a nut. At this point I was ready to route out my mold, but required two items. One was a circle jig. (you can buy these, but I just made my own from some 1/4" luan plywood) The other item was a tapered router bit, which allows easier extraction of your stator from the mold. A straight vertical raised-panel bit works perfectly.

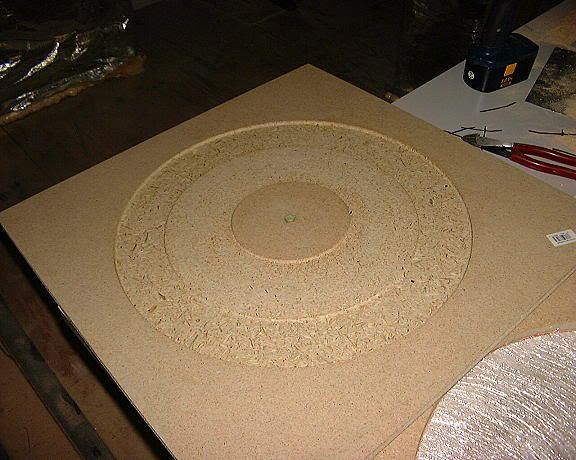
I set my circle jig to route out the inner diameter edge, and began to plunge cut the bit until it was as deep as the coil thickness. I cut all the way around, then did the same for the outer diameter. (in my case, my coils were a little thicker than the boards, so I ended up routing out a bit more in the lid. Don't do this, instead route deeper into the bottom board if need be. You'll have less problems with trapped air later)
What not to do: (domed lid)
I finished up by drilling a 1/4" hole dead center in the top board, and also drilling holes where I want the power output lugs (the brass toilet bolts) to go, and coating the inside of the mold with mold release wax.
Next episode, finishing up the stator.

 Reply With Quote


Bookmarks